

Benefits of Restoring Old Furniture
There are many benefits to restoring old furniture: it’s good for the planet, it’s often cheaper than buying a full set of brand-new pieces, and you can make use of old varnishes and paint. Investing time in a project can be hugely gratifying when you see the final product sitting in your living room and kitchen. Being able to claim that you were the one that got it to its current glory is always a boost to your self-esteem. Before you start getting out the sheets of sandpaper, what are the best methods for restoring outdated furniture?
Firstly: what can you save?
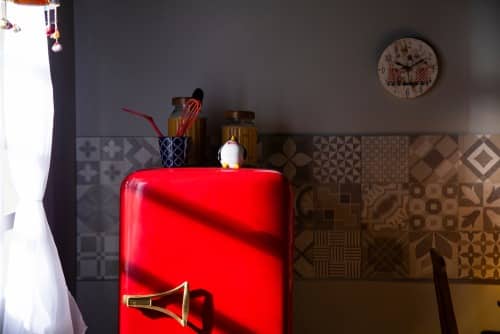
The first step you need to take towards overhauling your old furniture is to take a look at what you’ve currently got. Old bookshelves, wooden chairs, and tables are perhaps some of the easiest items to restore. On the other hand, a large 70s sofa that’s covered in brown velvet might be a bit too challenging – unless you have the skills to reupholster it. Wooden items are some of the easiest to renovate as you can sand them before painting. Metal and plastic items can be a bit more challenging, as the paint tends to peel and fall off.
If you don’t own a vast amount of outdated furniture, this is a good opportunity to go to used furniture store shopping. Searching ‘ second-hand furniture Charleston’, for example, will find you plenty of local thrift stores. Going through thrift stores to find out what can be salvaged is a great way of finding cheap items to get your hands on.
Protect yourself
Restoring old furniture is a much more monumental task than re-painting an old windowsill. The process of stripping and painting can generate strong fumes from various chemicals – not to mention an abundance of dust. It doesn’t matter whether you are working by yourself or as a team: before you start, put on eye protection, dust masks, and cover your hands and arms. Ideally, work in an open area or, at the very least, make sure it is well-ventilated by opening all of the windows. Keeping all strong chemicals away from your body while working is not only crucial for your health but will also eliminate any risk of needing to rush to the emergency room halfway through your project!
Clean the furniture
Cleaning your furniture first will not only prevent any lumps and bumps from appearing as you work, but it will also make life much easier for when you start sanding. Depending on what the item is, you might need a wash down with some soapy water. However, for tougher grime or wax, you might need a specialized cleaner or a spirit to cut through the grease.
Repairs
If your piece of furniture had hit the outdated pile due to general wear and tear, then don’t panic. Some dents, scratches, and breaks are actually very easy to repair – you need some patience and time.
- Broken leg: If you have a table with a leg that is susceptible to snapping now and then, you will be pleased to know that fixing it is easier than you might suspect. You will need to re-break the fracture to get the glue into the right place. Using a glue that is right for the material (probably wood), apply a liberal amount. Squeeze the two parts together and solidify the position using a clamp. Remember to wipe off any excess glue that bursts out of the sides – as this will look unsightly.
- Scratches and dents: Using a fixing putty is the best way of fixing dents. Using a small, sharp object to remove any dust or grit, fill in the gap with putty and wait for it to dry. Then, sand it down. This is perfect for going underneath the paint and other finishes.
Wooden furniture
Once you have cleaned the furniture, it’s time to get it ready for painting. If the item you are working with is covered in paint, you will need to use a coarse-grit piece of sandpaper or a sander. This not only prevents the paint from peeling but also gives you a nice new surface to work from. Alternatively, if there’s barely anything on the wood at all, you will need to use a fine-grit piece of paper to give the new layers of paint something to stick to. After that, it’s a matter of putting down a primer first and then layering the paint coats until you have the desired effect. Remember to allow each coat to dry first – this is where having a well-ventilated room or area comes in handy.
Before you get on with painting the furniture, it’s a good idea to mix the paint first. When you pop open the lid, you may notice a color difference or that there has been some separation in the tin. Mixing it first is also important for getting a consistent color throughout the process. Make sure that as you start applying it, you are in a well-lit area. This helps you judge how many coats are needed and whether you are happy with the shade you have chosen.
One last piece of advice when painting wood: buy new brushes if your current ones are looking a little ratty. There is nothing that will frustrate you more than constantly having to pick out bristles from your paintwork as you go along. It’s a good idea, too, to pick a brush that is the right size for the job. If you have more space to work on, then do invest in a larger brush. By searching ‘upcycle Charleston,’ you will fill find plenty of places ready to help you restore pieces of furniture, including projects such as ReStore Charleston. However, it can be just as rewarding to get stuck into an upcycling project yourself. Learning how to sand down a piece of furniture and give it a new lease of life can leave you feeling proud and fulfilled – not to mention the benefit of having a piece of furniture that feels virtually brand new.